


How to use FilePond with Rails' Active Storage
Learn how to integrate a third-party JavaScript upload library with ActiveStorage


FilePond is a beautiful JavaScript library for handling file uploads written by Rik Schennink.
I’ve used this library in various Ruby on Rails projects whenever I wanted a smooth upload experience paired with great UI visuals.
In this article, I’m going to go over how to integrate FilePond with Rails, and will describe and explain some of my technical choices as I go along. This tutorial also assumes some basic knowledge of Active Storage. If you are not familiar with this part of Rails, please have a look at the official Rails guide at https://guides.rubyonrails.org/active_storage_overview.html.
I'd like to acknowledge that @phlegx had previously described a solution geared toward Vue.js on FilePond's GitHub Issue Page. The solution required the use of the Axios library (JS) as well as the use of an internal Active Storage / Direct Upload API. If you're working with Vue.js, that solution may also be a worthwhile place to look at. I encourage you to take a look at both approaches to see which one works well for your use case.
Similar to my other tutorials, I will stick with "vanilla" Rails where possible. In other words, I will be minimizing external dependencies and will rely on well-documented APIs.
The demo code for this tutorial is located at https://github.com/Code-With-Rails/filepond-demo. I recommend that you clone that repository and run the demo from there. Everything is set up with Docker and can be booted up with the usual docker compose build && docker compose up.
What We Are Building
Here is a quick screenshot of what we will be building. Other than the widget itself, I've left out any default styling.
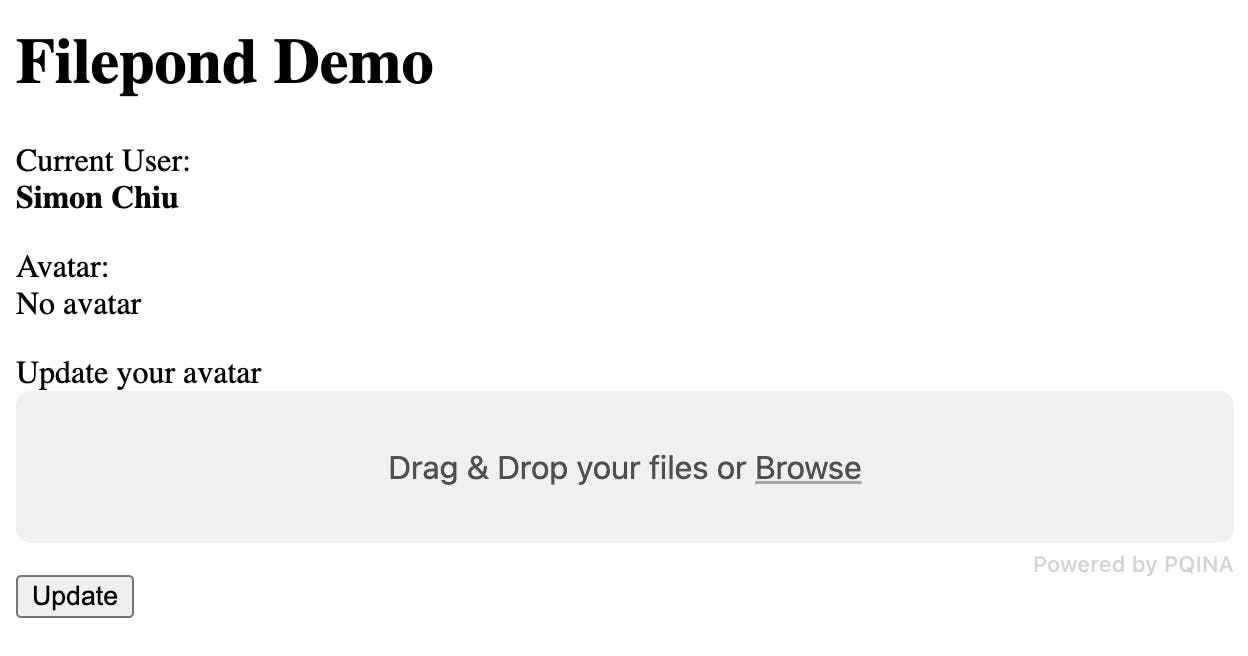
You can see the upload widget above.
Here's an animated GIF of what it looks like when we upload a picture:

To integrate FilePond with our app, there are two parts:
First, we will need to add the FilePond JavaScript library and enable it on our file input HTML tag.
Second, we will need to integrate FilePond with our Rails app. Specifically, we want Active Storage to handle the file uploads.
To accomplish the first part, we will use vanilla JavaScript. If you need to implement a Stimulus controller for this, the plain JavaScript code should be enough for you to create that implementation.
For the second part, we will leverage the existing Active Storage's JavaScript library and enable Direct Uploads. To accommodate some specific server endpoints that FilePond requires, we will create a custom controller.
Let's get started!
FilePond Installation
For this tutorial, we'll be starting with a Rails 7.0.x application. This means we'll be using importmap-rails to add our JavaScript dependencies.
If you're following along, remember to add the importmap-rails gem to your Gemfile after you've initialized your new Rails app:
bin/bundle add importmap-rails
bin/rails importmap:install
Next, we will need to add the dependency for FilePond with the following command:
bin/rails importmap pin filepond
We want to preload FilePond, so in the config/importmap.rb file, modify the file like so:
# Before
pin 'filepond', to: 'https://ga.jspm.io/npm:filepond@4.30.4/dist/filepond.js'

# After
pin 'filepond', to: 'https://ga.jspm.io/npm:filepond@4.30.4/dist/filepond.js', preload: true
Next, let's familiarize ourselves with FilePond and the way it works.
FilePond Basics
Here, we will take a look at FilePond and the simple example use of its API. The documentation for FilePond's API is at https://pqina.nl/filepond/docs/api/.
To initialize FilePond, we will need to first have an HTML file input element. Our form will look something like this:
<%= form_with model: @user, url: update_avatar_path, method: :post do |f| %>
  <%= f.label :avatar, 'Update your avatar' %>
  <!-- We'll transform this input into a pond -->
  <%= f.file_field :avatar, class: 'filepond', direct_upload: true %>
  <%= f.button 'Update' %>
<% end %>
The corresponding JavaScript code will look like this:
// application.js
const input = document.querySelector('.filepond')
FilePond.create(input)
That is the minimum of what you need for FilePond to convert a simple file input tag into the widget that you saw earlier.
After it is initialized, users will be able to asynchronously upload files to our server or cloud provider before they click on the Save or Update button. The user will be able to see the upload first and has the opportunity to cancel or re-upload a different picture before committing the changes.
Specific to what we are building here, we will implement the following:
Configure FilePond to perform direct uploads (using Active Storage's JavaScript library) to cloud providers
Configure FilePond and our app to allow upload with a remote URL only
Configure our application to purge unattached files (blobs) when users click on cancel (undo) in the FilePond widget
To be able to accomplish some of these things, we will need to refer to FilePond's server configuration section.
FilePond allows for several customizable server endpoints:
Processis required for asynchronous upload, and directs FilePond to properly reference our uploaded file in our form. We will be configuring this specifically to allow for Direct Uploads so that our uploads can bypass our Rails server completely and be uploaded to our cloud provider (eg. AWS S3).Process chunksis for processing the upload in chunk sets. We will not be using this.Revertis an endpoint that is called when the user cancels an upload. We will configure this to let our server know when a user has initiated a cancel so that our unattached file can be deleted.Fetchis an endpoint to allow users to drag and drop URLs onto the widget and upload files that way (rather than dragging the actual file itself). We will configure our application to be able to do this.
Note: Other endpoints are available and will not be configured here. Please have a look at these other endpoints in FilePond's documentation to see if you need them in your application.
Simple Rails application
We will first set up our data model so that Active Storage can associate file attachments.
To make things simple, we will create a User model and will attach an avatar for each one.
bin/rails g model User name:string
bin/rails db:migrate
In the user.rb file, let's update the model to this:
class User < ApplicationRecord
  has_one_attached :avatar do |attachable|
    attachable.variant :thumb, resize_to_limit: [100, 100]
  end
end
In the User model, we define an associated attachment of avatar so users can upload a personalized avatar that can be shown inside our application.
Next, we will create a controller and route to view and update this user.
bin/rails g controller Home index
For simplicity's sake, we will create three controller actions to handle everything we need for this demo app:
indexwill show the avatar attached to theUser, and will also display a form to update the avatar.update_avatarto update theUser's avatar.destroy_avatarto remove theUser's avatar.
Here's the code for the HomeController:
class HomeController < ApplicationController
  before_action :fetch_user

  def index; end

  def update_avatar
    @user.update(user_params)
    redirect_to root_path
  end

  def destroy_avatar
    @user.avatar.purge
    redirect_to root_path
  end

  private

  # We mock out our current user here by setting it as our first user
  def fetch_user
    @user ||= User.first
  end

  def user_params
    begin
      params.require(:user).permit(:avatar)
    rescue ActionController::ParameterMissing
      {}
    end
  end
end
The code for the controller should be fairly straightforward if you are used to Rails, but let's quickly over it.
We describe a
before_actionto set the@uservalue to the first user found. This is specific to our demo application where we have already seeded the first user, and so we will use this as our "logged in" user. In a real application, you may set this as acurrent_user, for example.Our first action is the
indexaction. This does nothing more than render our application's only page.The second action is the
update_avataraction. In a real application, you may wish to separate this to a different controller (eg.AvatarController). It can be seen here that we update the@userinstance with the params that is allow listed in theuser_paramsmethod that is below.The final action is the
destroy_avataraction which will remove the attached avatar.
Finally, let's populate the home/index.html.erb view:
<h1>Filepond Demo</h1>

<p>
  Current User: <br />
  <b><%= @user.name %></b>
</p>

<p>
  Avatar: <br />
  <% if @user.avatar.attached? %>
    <%= image_tag(@user.avatar.variant(:thumb)) %>
    <br />
    <%= button_to 'Delete', destroy_avatar_path, method: :delete %>
  <% else %>
    No avatar
  <% end %>
</p>

<div>
  <%= form_with model: @user, url: update_avatar_path, method: :post do |f| %>
    <%= f.label :avatar, 'Update your avatar' %>
    <!-- We'll transform this input into a pond -->
    <%= f.file_field :avatar, class: 'filepond', direct_upload: true %>
    <%= f.button 'Update' %>
  <% end %>
</div>
Again, our view is quite simple. Here's a quick summary of what it does:
We display the name of
@user. This is merely a quick check to ensure that@useris indeed set.Next, we display the avatar from
@user.avatarif it exists. If it does not, we will display a simple No avatar message. However, if an avatar exists, we will allow the user to Delete it.Finally, we have our form with a
file_fieldwhich will accept the file upload. We can see that we have setdirect_uploadto betrue. In a classic Active Storage set up, this will enable the corresponding Rails' JavaScript library to allow for direct uploads to cloud providers, bypassing the need for the server to first download the file and then re-upload it to the cloud. In our implementation, we will get FilePond to do the same.
Finally, let's define all the routes we will need for this app:
# config/routes.rb
Rails.application.routes.draw do
  post 'home', to: 'home#update_avatar', as: :update_avatar
  delete 'home', to: 'home#destroy_avatar', as: :destroy_avatar

  # FilePond endpoints
  post 'filepond/fetch', to: 'filepond#fetch'
  delete 'filepond/remove', to: 'filepond#remove'

  root to: 'home#index'
end
As you can see, all of this is standard Rails stuff and nothing new is introduced.
Now that we are set on the scaffolding side, we will move to instantiating our FilePond instance.
Integrating FilePond
Our first step will be to convert the file_field from the previous section to the widget that we first showed you.
Again, here's the screenshot of that:

To do this, we will use plain JavaScript:
// app/javascript/application.js
import * as FilePond from 'filepond'

const input = document.querySelector('.filepond')
FilePond.create(input)
Boot up the server, go to http://localhost:3000 and you should be able to see the above result.
If you try to drag and drop a file onto the widget, you will notice nothing works yet. So, let's configure FilePond to use Active Storage's Direct Upload feature.
Luckily, Active Storage's Direct Upload library allows us to integrate with third party JavaScript libraries like FilePond very easily (https://guides.rubyonrails.org/active_storage_overview.html#integrating-with-libraries-or-frameworks).
Note: Our demo app is not configured for cloud providers. However, if you do configure for cloud services, you will need to set CORS permission on there for everything to work. Refer to guides.rubyonrails.org/active_storage_overv.. for more information.
Let's set some FilePond configuration:
// app/javascript/application.js

FilePond.setOptions({
  server: {
    process: (fieldName, file, metadata, load, error, progress, abort, transfer, options) => {
      const uploader = new DirectUpload(file, directUploadUrl, {
        directUploadWillStoreFileWithXHR: (request) => {
          request.upload.addEventListener(
            'progress',
            event => progress(event.lengthComputable, event.loaded, event.total)
          )
        }
      })
      uploader.create((errorResponse, blob) => {
        if (errorResponse) {
          error(`Something went wrong: ${errorResponse}`)
        } else {
          const hiddenField = document.createElement('input')
          hiddenField.setAttribute('type', 'hidden')
          hiddenField.setAttribute('value', blob.signed_id)
          hiddenField.name = input.name
          document.querySelector('form').appendChild(hiddenField)
          load(blob.signed_id)
        }
      })

      return {
        abort: () => abort()
      }
    },
  }
})
Let us quickly summarize the above code here:
FilePond.setOptionsallows us to set a page-wide option for FilePond. In this case, we are telling FilePond that the library should run our customprocessfunction when a new file is uploaded.Next, we define a
serverobject. Within it, we have aprocessfunction. The function's argument signature is from FilePond's documentation. Much of theDirectUploadinstantiation comes from Rails' documentation with some refactoring.Within the
processfunction, we instantiate a Direct Upload instance. We define adirectUploadWillStoreFileWithXHRcallback, which Direct Upload uses once an upload is set to begin, to forward its own callback to theprogressfunction in FilePond. All of this seems convoluted, but essentially what is happening here is that we want Direct Upload and FilePond to talk to each other so that FilePond can display the upload progress.Next, we tell our Direct Upload instance to begin the upload with the appropriate success and error callbacks. If we are successful, then we will append a hidden input with our blob ID so that our form can properly attach the file as the user's avatar.
Finally, we have a
returnstatement at the end to return anabortmethod so that FilePond can be aborted. This extra bit is from FilePond's documentation.
If you try to upload a file right now, you will see that things still do not work. Rails has CSRF protection, so we will need to append this to every request FilePond makes to our server.
Just underneath process, let's append this:
FilePond.setOptions({
  server: {
    // ...
    headers: {
      'X-CSRF-Token': document.head.querySelector("[name='csrf-token']").content
    }
  }
})
Rails automatically renders the CSRF token on every page, so we can query this and get the value to send it along with our request as part of the header.
Now if you refresh the page and try the upload widget, it should work:

Let's set up a few extra functionalities while we are here. At the present moment, users have to already have the file they want to upload before they can drag and drop it onto the widget. Next, we will configure the widget to be able to accept URLs (eg. from the browser bar) as well.
Amend the code as such:
FilePond.setOptions({
  server: {
    // ...
    fetch: {
      url: './filepond/fetch',
      method: 'POST'
    },
    // ...
  }
})
The name fetch may not fully describe what is happening here. When you drag a URL onto the widget, what FilePond will do is get our server to first download the file. When this happens, FilePond expects the file's URL to be sent back to it where it can then go through the usual upload life cycle.
We have already set up our routes.rb for this endpoint, but we still need to implement a controller to handle this:
# app/controllers/filepond_controller.rb

require 'open-uri'

class FilepondController < ApplicationController
  def fetch
    # We explicitly declare this for clarity of what is in the
    # raw_post value as sent by FilePond
    uri = URI.parse(raw_post)
    url = uri.to_s
    blob = ActiveStorage::Blob.create_and_upload!(
      io: URI.open(uri),
      filename: URI.parse(url).path.parameterize
    )
    if blob.persisted?
      redirect_to rails_service_blob_path(
        blob.signed_id,
        blob.filename
      )
    else
      head :unprocessable_entity
    end
  end

  private

  # FilePond sends the value (eg. file ID, URL, etc) and it comes
  # through as the POST body. We can retrieve that value with this
  # helper.
  def raw_post
    request.raw_post
  end
end
In this controller, we fetch our file and convert it to an IO (input/output) Ruby object that we can create an ActiveStorage::Blob record in the next step.
We use ActiveStorage::Blob.create_and_upload! to do this. Here's the documentation for this part of Active Storage's API: https://api.rubyonrails.org/classes/ActiveStorage/Blob.html#method-c-create_and_upload-21
Arguably, this may not be the most efficient way to handle this, but FilePond requires us to first download the file and present it back to it.
You can see that in the very next line, we redirect to the blob with rails_service_blob_path. When FilePond receives this, it processes it once more and another ActiveStorage::Blob is created. In other words, the file is uploaded twice:
First when we download it and present it back to FilePond
Second when FilePond processes it
Arguably, we do not need to create a blob within our FilepondController. More than anything, the creation of that blob is to avoid having to use our app be blocked while it first downloads the file and then streams it back to FilePond. Instead, we are only blocked while we synchronously download it, but when FilePond accesses the file it is served by the cloud provider or local web server.
Depending on your server's traffic and the use of this feature, you will likely need to optimize this further. If you leave the implementation as I have described above, be sure to periodically purge unattached ActiveStorage::Blob records. Rails' official guide recommends you do this anyway (https://guides.rubyonrails.org/active_storage_overview.html#purging-unattached-uploads).
The final adjustment we will make to FilepondController is when a user removes an upload in the widget.
When this happens, FilePond calls the revert function. Here, we define a specific endpoint for this:
FilePond.setOptions({
  server: {
    // ...
    revert: {
      url: './filepond/remove'
    },
    // ...
  }
})
For our controller-side implementation, we add this to Filepondcontroller:
# app/controllers/filepond_controller.rb

class FilepondController < ApplicationController
  # ...
  def remove
    # We explicitly declare this for clarity of what is in the
    # raw_post value, as sent by FilePond
    signed_id = raw_post

    blob = ActiveStorage::Blob.find_signed(signed_id)
    if blob
      blob.purge
      head :ok
    else
      # If we cannot find the blob, then we'll just return 404
      head :not_found
    end
  end
end
This is more of a clean-up method than anything else. If you periodically purge those unattached ActiveStorage::Blob instances, you can skip this part altogether. However, it is always a good idea to keep things neat.
And that's it!
Conclusion
FilePond offers a great user interface for providing feedback to user uploads. Integrating it with Rails' Active Storage is not difficult, but requires a bit of customization.
This tutorial presents a way to integrate FilePond and applies as much vanilla Rails as possible. In the next part, I will use the implementation methods above and turn all of this into a gem that we can reuse without having to re-implement this every single time.